- Turn off the transceiver and disconnect the antenna and DC supply.
- Remove the top panel (8 screws).
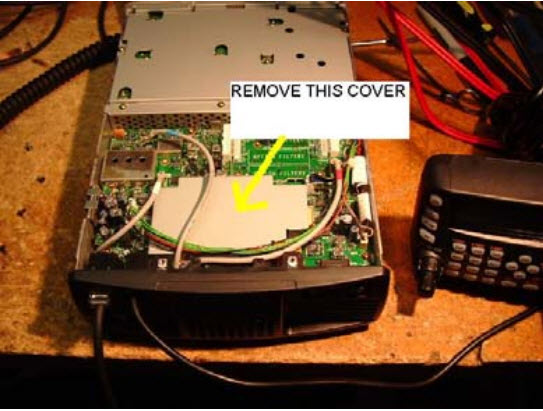
- Remove 4 screws from the shield plate and then remove the plate to access the TXRX (A/2) board (this shield plate is toward the front of the radio and only has 4 screws). Be careful to avoid damaging the wiring and coax cables that cross over the top of the shield plate.
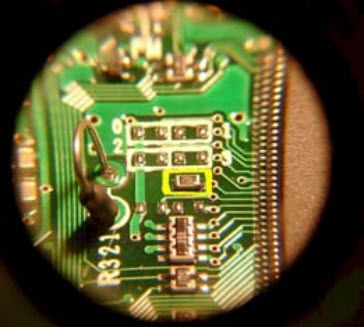
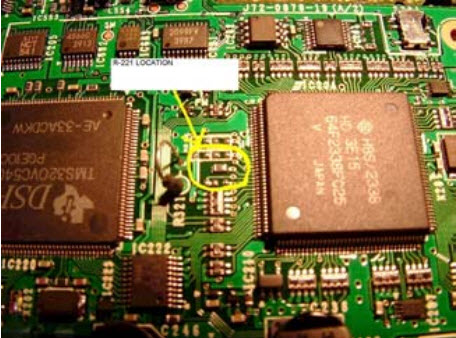
- After doing step above face front of radio toward you. Underneath the plate you just removed you will see two large IC’s. The one on the left has labeling saying “DSP”. Just between these two large IC’s is a resistor clearly labeled R321 (which is a large resistor mounted vertically). On resistor R321 you will notice that one of the leads attaches to circuit board then loops over to another pad on the circuit board, where it is connected. If you draw an imaginary line between the center of the leads of R321, going to the right toward the large IC on the right you will see one single surface mount resistor. If you have a magnifying glass it is labeled 102. This is R221 and the one you want to remove.. On either side of R221 are open pads (USA version).
- Locate and carefully remove resistor R221 from the TX-RX board.
- NOTE to our European hams: You may also see resistors in the 0, 1, 2, and/or 3 positions. In order to be able to operate in the full portion of 40M, remove any resistors in 0, 1, 2 or 3 positions. This would be in addition to removal of R221. You may wish NOT to remove R221 however, and you will still have TX above 7.100 Mhz. hanks to Hans, DJ6TJ for trying this out!
- Replace the shield plate removed in step 3. Take care not to pinch any wires in front of the shield. Replace the covers. It will automatically reset when turned on. Transmitter Frequency Range: 1.700 – 30MHz, and 49.00 – 54MHz (R221)
- Transmitter Frequency Range: Ham bands, plus 7.100-7.300 Mhz (0, 1, 2, 3)
Theme by Anders Noren — Up ↑